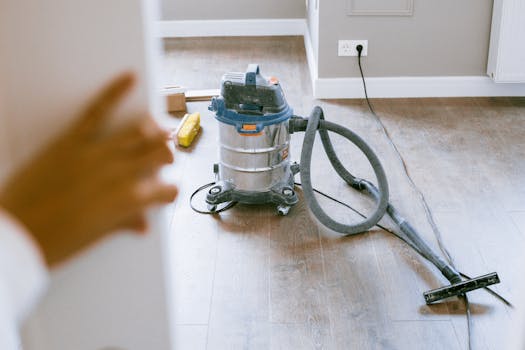
Many dogs will react to vacuum cleaners in a way that we do not enjoy as humans. Barking, biting, cutting you off and blocking your path, running and hiding can all be unfortunately common occurrences. There are two main components to vacuuming. First, there is the sound. Second, there is movement. It can be very beneficial to practice each component separately before trying to work on them at the same time. It is best to start with the piece of vacuuming that causes the smallest reaction. For some dogs, this may mean practicing with a recording of your vacuum cleaner or training near the closet where the vacuum is kept.
Here is a video demonstrating the steps.
Take your time
This training takes time. While working on improving reactions to the vacuum it is best for the dog to be put away when actual vacuuming is occurring and the stimulation would push the dog to react. In these situations, when actual vacuuming must be done, it is best to give the dog a space away from the visual and sound components as much as possible. Having play time outside or a food puzzle in a separate area of the home are great options.

Recognizing stress
Recognizing stress, fear, or building tension is an important part of successful training. Watch for changes in body language such as:
Noticing these more subtle changes will be very helpful in knowing when to take a break or decrease the intensity. If you see any changes, lower the intensity by decreasing movement, moving away, turning the volume off, or taking a break. Even practicing for a minute or two at a time can improve the dog’s perception of the vacuum. Shorter practice that ends before signs of stress is better than longer practice that results in a stressed dog.
The Sound
Some dogs may need to start with a recording of the vacuum cleaner to be comfortable enough to take food. Always start well below the point that is known to become problematic. For example, during the first session volume starts at 1 and works up to volume level 10 before any problems occur. Then the second session starting below 5 volume and moving forward is a good idea. If the dog is very fearful it may even be a good choice to start back at volume 1 for a few sessions.
Actual practice with the recording for a session be done in the following sequence:
After a few sessions, once the dog is not reacting to the above sequence, it may look like this:
After a few sessions the volume can be increased, OR the sound can be left on for a longer timeframe. It is best to make only one component more difficult at a time.

When there is no longer any stress response to the sound being started, it can begin to be used as background noise while doing fun training practice of known skills.
Once the sound can be practiced at full volume, practice in the presence of the vacuum cleaner. It is a good idea to decrease the volume for a session or two when adding the visual of the vacuum cleaner.
When there is not any stress at full volume in the presence of the vacuum cleaner, start working on the actual sound of the vacuum cleaner. For very fearful or reactive dogs, it is often useful to have a helper. One person runs the vacuum so the other can focus solely on the dog. Having two people allows the dog to be close to the person giving the food and simultaneously far away from the vacuum. Initially, starting across the room or even in a different room may be needed to stay below the threshold of reactivity.
When starting with the vacuum running, going back to the initial on, off, treat, can be helpful.
If there is any hesitation or stress noted during training, increase distance or block the visual of the vacuum. Work through the same steps as were used with the recording. Be sure to only make one piece more difficult at a time. How close the dog is to the vacuum, how much of the vacuum the dog can see, the duration of it running and the way it is facing can all play a part in the dog’s comfort level.
The Movement
Find a point that does not cause a reaction. Sometimes that is just opening and closing the closet door where the vacuum is kept. Other times it is touching the handle to tip it back. Stay at a level of movement where everyone is able to be successful. Increase the movement slightly as the dog is successful. The series of repetitions working on movement may look like the following steps.
Repeat the above sequence until your dog is expectantly looking forward to the food when you reach for the vacuum. Keep in mind that some dogs reaching towards but not touching the vacuum is a better starting point.

Over time work toward holding the vacuum cleaner for a longer time. Then add small movements. When adding movement, be aware of the direction you are moving. Moving directly towards the dog is going to be much more difficult and intimidating than moving parallel to where your dog is sitting or standing.
If your dog is highly reactive and attacking the vacuum, please reach out for professional help.